
⚔️ Blocking Attacks: Taking Defense to the Next Level
✋ New here? pause. Make sure you’ve gone through the Intro and completed Part 1, Part 2, and Part 3 of this series. What we’re doing here builds directly on those steps—so you’ll need that foundation.
In Part 3, we explored how to craft custom detection rules that alert us to threats as they unfold on a Windows system. That’s powerful—but imagine if we could take it a step further and block those threats in real time, not just generate alerts.
That’s what this post is all about: building your first blocking rule to actively disrupt ransomware behavior before damage is done.
Why Blocking Rules Matter
Detection is great, but blocking is better—if done right. And that “if” is a big one.
Pro Tip: Before turning any detection rule into a blocking rule, you must properly baseline your environment to weed out false positives. Failing to do so could lead to breaking legitimate workflows or services. Baselining is an essential SOC analyst skill and requires patience and diligence.
A good practice is to run your detection-only rule for a few days (or weeks), fine-tune it, and only then convert it to a blocking rule once you’re confident in its accuracy.
Our Blocking Target: Volume Shadow Copy Deletion
Let’s jump into a practical example.
One of the most predictable behaviors during a ransomware attack is the deletion of Volume Shadow Copies. These snapshots are often a last resort for recovery, so ransomware tries to delete them early.
The classic command looks like this:
vssadmin delete shadows /allThis isn’t something you’d typically see in a healthy system—making it a prime candidate for a blocking rule. Still, don’t skip baselining—some backup or imaging tools might run similar commands occasionally.
1. Hands-On: Detecting the Threat
- Fire up your lab — You’ll need both your Linux and Windows VMs and access to a Sliver C2 shell.
- SSH into your Linux VM and reconnect to your victim system’s C2 session. (Refer to Part 2 if needed.)
A. From the Sliver C2 shell, run the following command:
shell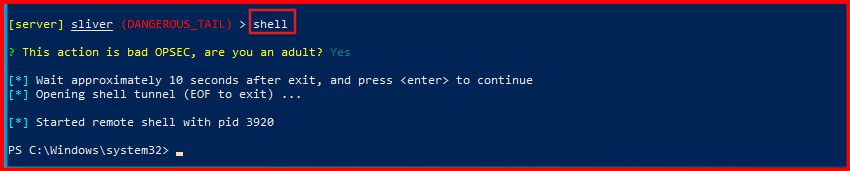
Confirm the OPSEC warning with Y, then enter the System shell and run.
B. In the new remote shell, run the following command:
vssadmin delete shadows /all
NOTE: The output of the command isn’t important, there may or may not be Volume Shadow Copies present on the VM to delete. What matters is that running the command generates the telemetry we need for detection.
C. Confirm you still have an active shell by running whoami:
whoami
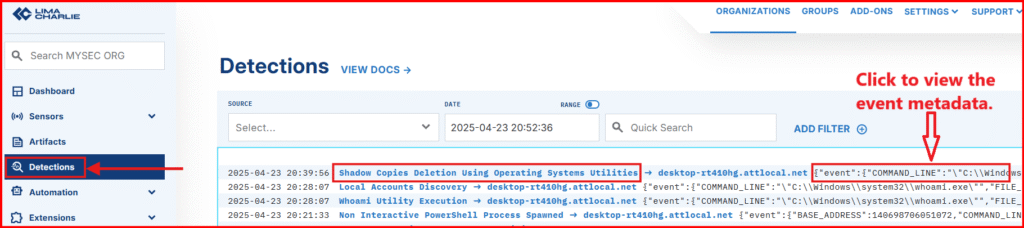
D. Head over to LimaCharliese’s detection tab to see if default Sigma rules picked up on our shenanigans.

E. Expand the detection to view all the associated metadata. One of the strengths of Sigma rules is that they often include helpful references, giving you context and insight into why the detection was triggered in the first place.
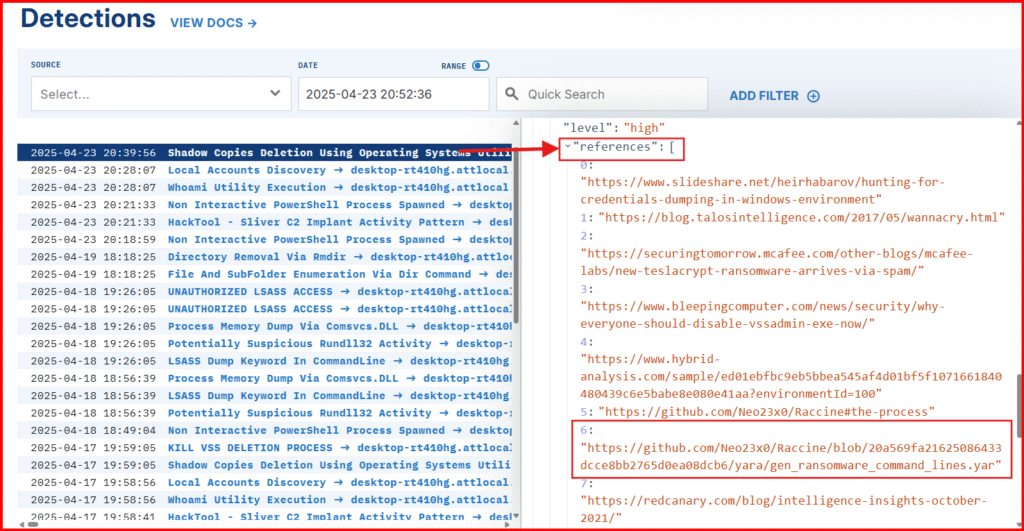
One of the reference URLs points to a YARA signature by Florian Roth, which includes several additional command-line variations you might want to incorporate into a more comprehensive detection rule.
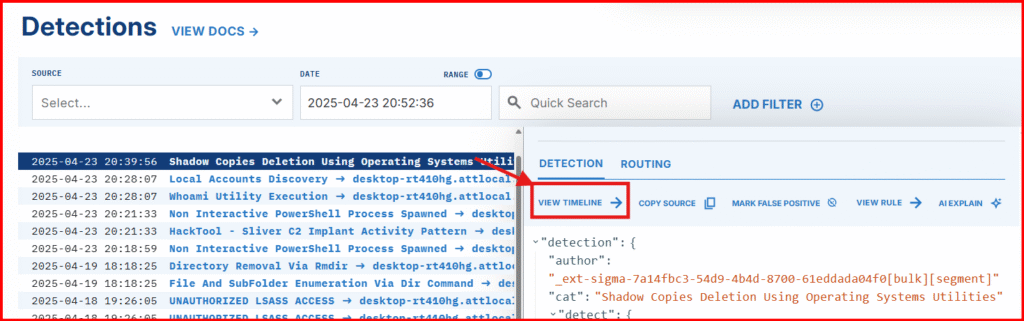
F. Open the Timeline to examine the raw event that triggered this detection.
Time to Create our custom Detection & Response (D&R) Rule
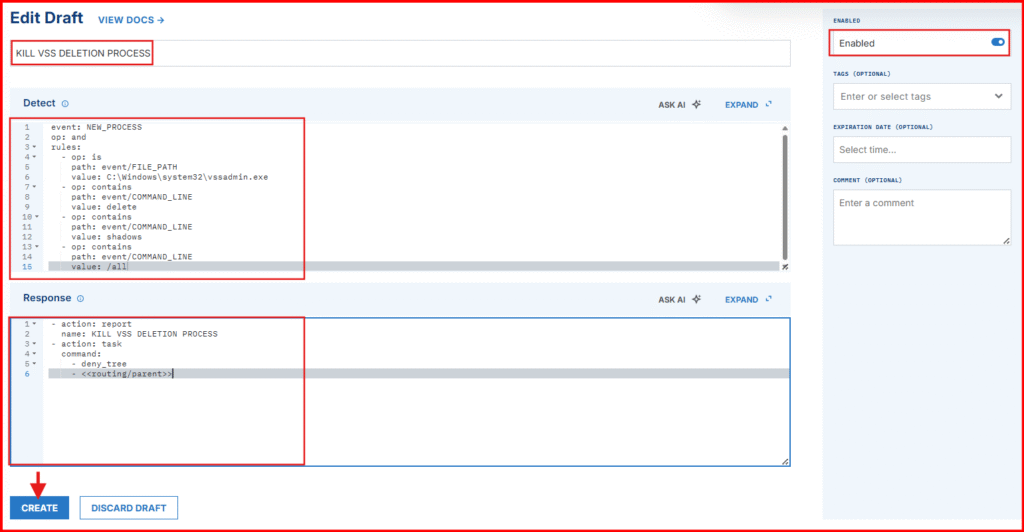
G. In the “Detect” section, clear the default content and paste the following:
event: NEW_PROCESS
op: and
rules:
  - op: is
    path: event/FILE_PATH
    value: C:\Windows\system32\vssadmin.exe
  - op: contains
    path: event/COMMAND_LINE
    value: 'delete'
  - op: contains
    path: event/COMMAND_LINE
    value: 'shadows'
  - op: contains
    path: event/COMMAND_LINE
    value: '/all'
Flexible matching technique: This rule detects when a new process is created that runs the vssadmin.exe tool with a command line containing delete, shadows, and /all. This pattern matches an attempt to delete all Volume Shadow Copies, a behavior often seen in ransomware attacks trying to prevent system recovery.
By catching this specific combination. This approach is much harder to evade and keeps your rule effective even against minor variations.
Configure the Response:
H. In the “Respond” section, replace the contents with:
- action: report
  name: KILL VSS SHADOW DELETION
- action: task
  command:
    - deny_tree
- <<routing/parent>>- The – action: report sends the detection to the dashboard.
- The – action: task terminates the parent process using deny_tree, which is critical because this is often the malware process in real-world attacks.
I. Save your rule as: KILL VSS SHADOW DELETION
2. Let’s See The Block in Real Time
Now, test the rule:
A. From your Sliver C2 shell, rerun:
vssadmin delete shadows /allIf the rule worked, the system shell should hang or display “Shell Exited”—a sign that the parent process was successfully terminated.

NOTE: In some cases you will need to run the whoami command to get the Shell Exited output.
B. Head to the Detections tab to confirm we have new threat Detection

C. Expand the detection to see the raw event

This approach is effective because, in a real ransomware scenario, the parent process is often the ransomware payload or a lateral movement tool—terminating it helps stop the attack in its tracks.
🏁 Keep Going
Congrats—you just built and validated your first blocking rule!
This is a huge milestone in your blue team journey. You’ve gone from emulating threats to proactively stopping them. Now, keep going:
- Tune your rule for broader coverage
- Test with more variations
🧪 Get hands-on. Break things. Learn by doing.
That’s how real detection engineers are made.
Stay sharp. Stay curious. 🕵️♀️🛡️
What’s Next?
Time to Level Up Your Threat Hunting Skills
Jump into Part 5, where we dive into more advanced detection techniques—starting with a powerful tool YARA scanning to uncover hidden threats and sharpen your detection skills even further.
Part 5 – Advanced threat hunting with YARA.


